This blog post is part of the RIBA plan of work series. Here we’ll be covering Stage 3 of the RIBA plan of work which covers spatially coordinated design.
The purpose of Stage 3 is to spatially coordinate the design. The information at the end of this stage needs to be coordinated sufficiently so that minor changes can’t happen at Stage 4 and you can submit a planning application with detailed information for the design.
Stage 2 of the Architectural Concept should be finalized and approved, along with the Project Brief before proceeding into Stage 3. The project shouldn’t proceed to Stage 3 if any spatial requirements or adjacencies remain inconclusive. During Stage 3, the Change Control Procedures should be used to manage any functional changes to the Project Brief and Architectural Concept. Minor aspects of the design may need to be adjusted in response to tasks underway. For example, a core might need to be rearranged in order for the toilet and riser layouts to work out.
To design a Stage 3 Spatially Coordinated, each design team member would work independently at Stage 4, or you could coordinate with specialist subcontractors on design. All of the project information should be coordinated too.
The majority of Project Strategies (produced by specialist consultants) should be coordinated and concluded by the end of Stage 3. Allowing work on other Strategy items to enter Stage 4 is only disruptive to the design process if the designer has not been included in early discussions on a Strategy matter.
We expect the lead designer to review the services schedules for specialists and comment on what tasks have been proposed when they will be undertaken, and if any tasks may interfere with the Stage 4 design process.
The design team may want to consider changing the design process, including early Stage 4 information delivery, in order to make the procurement process more effective. For example, being able to provide a scope of work or detailed design for a complex area of the project, like the cladding, will have an immediate benefit. The contractor will have an easier time bidding on items because they don’t have to assume what they will be responsible for. All aspects of the project are listed out in depth so that contractors know exactly what needs to be done.
Following our main post on RIBA Plan of work we’re going to cover the RIBA Stage 2.
Stage 2 is all about getting the concept design right and making sure that the visuals of the building are proceeding according to the client’s vision. The critical challenge of this stage is to make sure that the tasks undertaken are aligned with the goals of Stage 2. Going into too much detail too early can divert the attention away from what matters most for Stage 3; but if there’s not enough detail, Stage 3 becomes inefficient.
Dealing with Planning first
The RIBA recommends dealing with any developer obligations and levies before submitting an early planning application, because it’s quite risky. You may encounter clarity regarding these additional costs when you submit an early application. if not, you risk running into many project risks.
One of the most difficult tasks for a project team is determining where Stage 2 begins and ends. The RIBA Plan of Work requires that a design Concept be produced first before moving but not get into the detail design.
Dealing with the right amount of design concept design
One challenge at Stage 2 is determining what tasks and information requirements are needed to achieve the goal of the stage. In some cases, a designer might need intuition to design or make an architectural concept. In other situations, a detailed analysis might be required in order to test the design that has been created.
For example, some clients might be happy with “rule of thumb” calculations for stairways and toilets in an office building, or for light touch engineering inputs for other elements. Others may want greater certainty in the design, requiring detailed calculations for these elements. It’s important that the lead designer focuses the designing team on tasks which support and underpin the goals of Stage 2 and that will make the design as resilient as possible when Stage 3 starts up, when work will need to intensify on engineering teams and specialists needs to accelerate with work on this project.
Clients need to decide what information is required at this stage. Do you want to invest in large quantities of 2D content? 3D technologies, including VR and AR, are no longer gimmicks. They’re valid ways of undertaking Design Reviews and their usefulness should be considered alongside the requirement for traditional deliverables.
Personal protective equipment, or PPE, is any type of clothing or device worn by workers to protect themselves from hazards on the job. Construction workers are especially susceptible to injury, so it’s important that they have the right PPE to protect them from harm. There are many different types of PPE available, and each has its own purpose. Common items include hard hats, safety glasses, earplugs, and reflective vests. In some cases, workers may also need to wear respirators or other devices to protect themselves from airborne particles. No matter what type of work you do, it’s important to always wear the proper PPE for the job. Keep reading to learn more about personal protective equipment in construction and how it can keep you safe.
PPE
What is personal protective equipment?
Personal protective equipment (PPE) is clothing and gear designed to protect workers from serious workplace injuries or illnesses. Construction workers need PPE when working with dangerous materials, operating heavy machinery, and performing other potentially hazardous tasks.
There are four main types of PPE: respiratory protection, hearing protection, eye and face protection, and head protection.
Respiratory Protection: Construction workers are often exposed to dust, fumes, and other airborne contaminants that can be harmful to their health. Respiratory protection devices filter out these contaminants to help protect workers’ lungs.
Hearing Protection: Exposure to loud noise can damage workers’ hearing over time. Hearing protection devices, such as earplugs or earmuffs, can help reduce this risk.
Eye and Face Protection: Flying debris, chemicals, sparks, and other hazards can injure workers’ eyes and faces. Eye and face protection devices guard against these dangers.
Head Protection: Hard hats are the most common type of head protection worn by construction workers. They help protect against falling objects and collisions with walls or other objects
The different types of personal protective equipment
There are several different types of personal protective equipment that can be used in construction, each with its own advantages and disadvantages.
The most common type of personal protective equipment is the hard hat. Hard hats are made from a variety of materials, including plastic, metal, and fiberglass. They are designed to protect the head from falling debris, electrical shocks, and other dangers. Hard hats come in a variety of sizes and styles, so it is important to find one that fits well and is comfortable to wear.
Another type of personal protective equipment is protective clothing. This can include items such as gloves, aprons, overalls, boots, and masks. Protective clothing helps to protect the body from hazardous materials and conditions. It is important to choose clothing that is made from breathable materials so that you do not become too hot while working.
Eye protection is another important type of personal protective equipment. There are a variety of options available, including safety glasses, goggles, and face shields. It is important to choose eye protection that will fit well and provide adequate coverage.
Finally, hearing protection is also an important consideration in construction. There are a variety of earplugs and earmuffs available to help protect against loud noises. It is important to find hearing protection that is comfortable to wear and does not interfere with your ability to hear warnings or instructions from others on the job site.
When is personal protective equipment required?
There are a variety of circumstances in which personal protective equipment (PPE) is required in the construction industry. Some PPE is required by law, while other items may be recommended or required by the employer.
Some examples of PPE that may be required in construction settings include:
-Hard hats -Safety glasses or goggles -Earplugs or earmuffs -Respirators or dust masks -Gloves -Steel-toed boots
When working with or around hazardous materials, PPE is often necessary to protect workers from potential health risks. Depending on the type of hazard, different types of PPE may be required. For example, when working with asbestos, workers must wear respirators and special clothing to avoid exposure to the harmful fibers.
In general, workers should always consult with their supervisor about what PPE is necessary for their specific job duties. Employers are responsible for providing workers with the PPE they need to stay safe on the job.
How to properly use personal protective equipment
When working in construction, it is important to wear the proper personal protective equipment (PPE). This includes hard hats, safety glasses, gloves, earplugs or muffs, and reflective vests or clothing. Wearing the proper PPE can help protect you from injuries caused by falling objects, flying debris, electrical shocks, and more.
When working with power tools, always wear safety glasses to protect your eyes from flying debris. If you are using a power saw, make sure to wear a face shield in addition to safety glasses. Also be sure to wear hearing protection when using noisy power tools.
Always wear gloves when handling sharp or rough materials. This will help protect your hands from cuts and scrapes. If you are working with chemicals, make sure to wear the proper gloves to avoid skin irritation or burns.
When working outdoors, always wear a reflective vest or other brightly colored clothing so that drivers can see you. And be sure to stay aware of your surroundings at all times to avoid potential hazards.
Conclusion
Personal protective equipment (PPE) is a critical part of any construction worker’s safety repertoire. Whether it’s a hard hat, safety glasses or gloves, PPE helps protect workers from serious injuries and fatalities. With the construction industry growing rapidly, it’s important for workers to be aware of the different types of PPE available and how to properly use them. By understanding the importance of PPE and using it correctly, construction workers can help keep themselves safe on the job site.
As part of the RICS construction technology we (land surveyors and quantity surveyors) need to know a number of basic construction technology. In this series of blog posts we’ll be covering the substructures.
Buildings are separated into two parts: the part generally below the ground floor (substructure) and which extends down into the ground, and the part above the ground floor. This blog post covers the substructure, from ground conditions to building construction from the foundation below.
The classification of ground conditions
When we think of ground conditions, they’re usually classified as either topsoil or subsoil. Organic matter is a big part of topsoil, which also has a high concentration of insects and worms. Vegetation grows in topsoil, and that’s what people usually refer to when they say “topsoil.”
What is Topsoil and how do you deal with it
Below the layer of topsoil there is a thin layer where both topsoil and subsoil mix. It’s considered “topsoil” for our purposes in building construction. This transitional area marks the meeting between the two types of soil.
The layer beneath the topsoil is without any organic constituents, although this layer might be home to living creatures that burrow below the soil.
Building Regulations require that soil beneath the building be completely excavated. The consequences of not doing so vary depending on a range of factors, but are mainly based on three reasons:
Topsoil isn’t strong enough to hold up buildings, and it can’t keep them anchored in place.
Topsoil contains organic matter which if left under the building will rot and cause a health hazard. Rotting vegetation also attracts vermin, especially insects, and this can be a source of disease, among other things.
Surfacing the area will remove all roots, bulbs, corms, seeds or tubers that are left behind. Roots can penetrate drainage and ducting systems and block supplies or discharges.
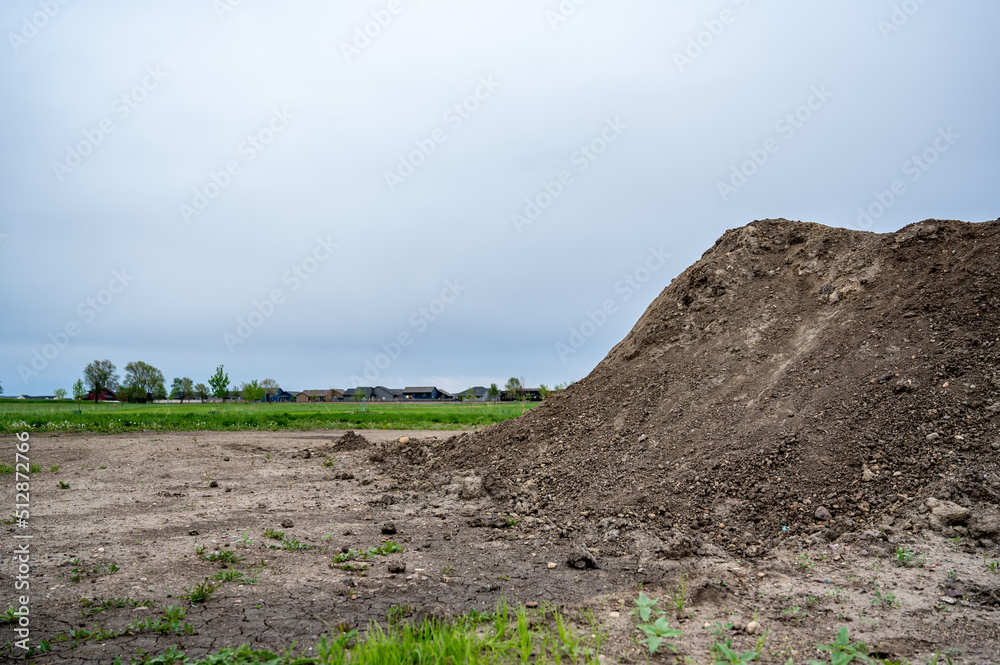
stockpile of soil
The thickness of topsoil in the UK
With any building, the thickness of the topsoil will always affect the cost. Remember, you have to remove thicknesses, which makes things more expensive. Around the UK, there’s a general thickness of 200mm at ground level where farmers have cultivated it and a depth of 100-150mm in untouched areas with good vegetable growth. Obviously, there are exceptions—areas where soil heath is prevalent and large areas with peat or little growing on them. But as well as these less-than-ideal conditions, you’ll find demolition sites (where typically there is little or no topsoil) and dumping sites that result in depressions (where there can be less than usual). Still, we won’t go into foundations for these extreme conditions but will stick to discussing simple topsoils over stable subsoils.
One of the difficulties with drawn presentations is that many of them are designed without thinking about what site or situation they will be used for. It then falls to the designer to make assumptions about a ‘standard’ which can be seen by everyone wishing to interpret the drawings. This idea of having a standard will come up again as we progress through the posts on this blog. The ‘standard’ thickness of topsoil is typically 150 mm, so this will be how we represent measurements on drawns in our presentation.
When the majority of any structure is being built, it’s typical to remove the topsoil from the immediate area of the building. Excavators (360) are so much cheaper and easier to work with now. So instead of removing the soil in a small space, it’s more common to remove the topsoil across a larger site and stored aside or taken offsite.
The topsoil is often needed for garden ground around the building, so you must find a way to preserve it. (And there is a special way of preserving and storing them on site which is detailed in the British standard (3882:2015)).
Spoil and taking it offsite
Any excavated material is called spoil and can be disposed of offsite or placed onsite.
Topsoil can be removed from the site as long as it’s disposed of, stored correctly.
Topsoil should be immediately spread around the site being worked on when performing this process. Bringing the surface to a desired level, this step is typically called “spreading and levelling”.
The spoil heaps for topsoil shouldn’t be higher than two and a half metres. Storage in higher heaps can cause a problem for the soil in the long term and kill the bio-organisms living in there for the plant.
Three types of subsoil
There are three types of subsoils:
These soils are able to carry the weight of a low-rise building without any special construction techniques or precautions.
Those who are able to manage the structural load of a much larger building with efficient foundation techniques.
Unique circumstances require special techniques or precautions for even the most basic of structures.
We will focus on the first type. But first, let’s look at the soils. The soil we’re talking about is called subsoil. It doesn’t start at a dividing line separating it from the topsoil rather, there is a gradual transition between one and the other and it generally occupies a layer 50-75 mm thick. This transitional layer isn’t an ideal place to build on, so foundations are placed in the subsoil rather than above it
So, is there a standard thickness of subsoil? Again, no. There’s no end to the subsoil because it should theoretically be from the surface all the way to the earth’s core. But for practical purposes, it usually only goes so deep into the crust. Is there a standardized type of subsoil? No. Subsoil varies all over the world according to what soil that can be found at different depths with various thicknesses.
Regardless of the thickness or density of the soil, it is important to keep loadbearing capacity in mind for individuals placing foundation. Loadbearing capacity can be defined as the force that acts on a unit area which will cause a foundation to fail. To be safe, we need a margin of safety and arrive at what we assess to be the safe loadbearing capacity. There are many factors that go into determining loadbearing capacity, not all of them applicable to every kind of soil:
Kind of soil
The thickness of the layer of subsoil.
Kind and thickness of layers underlying the subsoil
The depth and thickness of soil layers
Moisture content and water level
Degree of containment of the layers
The presence or absence of underground flowing water.
In order to determine the loadbearing capacity of a foundation when constructing walls on a building site, the general approach is to classify the subsoil into various types. Designs have been greatly improved since the early 20th century, and new books generally contain an approximation of this capacity in kilonewtons (kN) or newtons (N). This capacity is adequate for common work that includes foundations as long as it’s adjusted to safe loadbearing capacity. Thinner soils or layers with lower capacities may require professional intervention from soil mechanics specialists. These specialists are available to inspect the subsoil at your building site and analyze its strengths and weaknesses by testing for loadbearing capabilities.
soil
The categorization of subsoils and their loadbearing capacity
The Building Regulations generally have a lot to say about loadbearing capacities. In this case, the Regulation takes the form of reference tables for foundations that identify a range of widths for strip foundations in various mixtures. Soil type can be determined on the basis of whether it is gravel, sand, silty sand, clayey sand, silt or rock. The condition of each soil type can assessed with regard to its compactness (compact or stiff), firmness (firm or loose), and softness (soft or very soft). Only rock foundation strips are allowed to be as wide as the wall itself. Other foundation services must meet specific minimum widths depending on the subsoil and its condition. The widths allowable are noted underneath our table of readings.
Here are some tables that have been used in building research to develop tables for optimum foundation widths. Although they vary slightly, they’re all based on Building Research Station Digests 64 and 67 published in the 1970s. For example, one table quoted in some Regulations gives a width of 400 with a wall load of 40 kN/m^2. If you take the time now, you’ll see that this equals 100 kN/m^2. This is despite the fact that maximum loadbearing capacity is up to 600 or even 1000 kN/m^2 in many textbooks! Approved by rule of thumb cited above, calculated safe bearing capacities would be 150 and 300 kN/m^2 respectively, which indicates that the figures quoted in the Regulations for foundation widths and safe bearing capacities have a much higher margin of safety.
Foundations
Now that we’ve looked at the properties of different soil types, it’s time to look at foundations. There are a wide variety of loadbearing characteristics in the soil tables mentioned earlier, and you’ll need a few techniques to build on different ground conditions. First, you should know that most foundations are made by pouring wet concrete into holes drilled in the ground. The shape can be made as simple or complicated as you require, and everything in between. You’re only concerned with straight pieces of concrete cast into the ground that present a flat surface where walls can be built upon. Concrete is discussed more thoroughly in Appendix D, which should be read if this chapter gets too technical for you.
If we were building with a rock that has simple foundations, the foundation would be rock solid. No elaborate foundation is needed. All you need to do is level out the ground and build your frame or walls straight off of the ground. Strip foundations are often used for medium-sized buildings that stand on stable ground and can withstand natural earth movements. In contrast, deep strip foundations are used for larger buildings that need more support against forces that could move the base of the building away from its walls
In strip foundations, a wide trench is dug with walls built off of the layer of concrete. In deep strip foundations, a narrow trench that’s not much wider than the wall is dug, and then filled up with the concrete almost to ground level. We’ll examine these two types of foundation in greater detail later in this chapter. The other extreme would be soft ground overlying a firm strata with good loadbearing characteristics.
When it comes to building a structure, an engineer must be aware of the type of ground (e.g. crystalline, sedimentary) that is supporting the building and choose appropriate construction methods and materials accordingly. In cases where there are large piles present in solid soil strata beneath the building site, they can be driven until they reach the bearing layer. Once this has occurred, beams can be cast into these piles to form the foundation for desired buildings. However, if there are high concentrations of waves or slides present beneath the site, this process would most likely prove ineffective. For this case we could use the raft type of foundation instead — which would involve placing a thin layer of concrete over areas that requires support for the building and then hoisting them up higher so that water filters through and carries away any rough spots below it. If this is not a feasible option or something you feel like doing yourself, then piling might be another great alternative. This involves driving long columns of materials – usually concrete – into the earth to ensure a stable foundation can be built on top of it afterwards; just make sure to keep in mind that you need to know what type of ground (e.g. crystalline, sedimentary) you’re working with before building the foundation.
I will cover the different types of foundations in another post.
The principal considerations of installing foundations
Building foundations are designed to provide a base on which the building can be:
built so that it won’t sink or cave in.
Stop a building from being lifted off of the ground
Both mentioned above
The regulations state that any movement in the soil cannot compromise foundations on this type of land. The most common causes of this form of foundation instability are groundwater seepage and shifting soil layers.
(1) it swells or shrinks, causing the building to be displaced. Plants take up a great deal of moisture from the ground and in transpiration this passes into the atmosphere. Trees are major water users and many species such as poplars and willows use more than most. This allows them to extract moisture from clay during drought conditions, which can cause clay to shrink. Trees should be kept away from buildings or vice versa when an encounter with shrinkable clay is present.
(2) The subsoil is moist; because of this, it freezes and causes your building to be unstable.
Conclusion
We’ve now learnt about the two different types of soil and covered the three types of subsoil. If there are any issues or have a question please leave your response in the comments below.